archive by month
Skip to content

the joy of inferring tech buildings

The picture is from a test game against the built-in AI. The columns on the right are a new debug display. The game was played to test an unrelated new debug display, which is not showing. Because of a newly-introduced bug (success! I’m introducing new bugs as planned!) Steamhammer had trouble against the built-in AI and did not win until late.

test game screencap

The green unit types on the right are Steamhammer’s units. White is the count of completed units, yellow is the count of uncompleted units. Hmm, 19 uncompleted zerglings, an odd number? That is because 2 zerglings in an egg may not hatch at exactly the same time.

The orange unit types are the enemy units. The white numbers count enemies that have been seen, and the red numbers are inferred enemy buildings. For example, Steamhammer has seen observers, so it knows that there must be a robo fac and an observatory. But wait, why are there a hatchery, a hydra den, and a spawning pool among the inferred enemy buildings?

Ha ha, protoss mind controlled a lurker! It’s there on the list of enemy units. Bug 1: The building inference code doesn’t know about mind control. Bug 2: The code also does not know that lurker research implies a lair.

Bug 1 takes effort to fix in full generality, because you have to remember what units the enemy has mind controlled, and Steamhammer doesn’t track that (or need to for now, it’s rarely important). If enemy protoss mind controlled your carrier, you can’t infer from that carrier that the enemy has a stargate and fleet beacon. If enemy protoss mind controlled an SCV and never mind controlled a marine, then you would like to infer a barracks from seeing a marine. For now I put in a simple workaround: Require an inferred building to belong to the same race as the enemy. That will reduce the errors, at least.

Mind control is a very sharp corner case, it can cut.

Bug 2 I decided also to leave unfixed for now, because there is another bug hiding behind it, related to zerg. Inferring buildings from tech adds complexity. If you have seen 1 enemy hatchery and later see a lurker, implying a lair, does that imply that the enemy now has 1 hatchery and 1 lair? No, the hatchery might have morphed into a lair. In effect, a lair is a hatchery and a hive is a lair, but not the reverse. Similarly if you see a guardian, implying a greater spire. Most tricky.

experience with Steamhammer’s burrowed zerglings

Steamhammer’s ostensible Killer Feature or tournament surprise was burrowed zerglings to block the opponent from taking nearby bases. The lings are assigned to Watch squads to watch the bases, and burrow there as soon as burrow is researched. How did it work out? Do the Watch squads contribute to Steamhammer’s strength?

My conclusion: Yes. The cost is the expense of researching Burrowing (100/100) plus the assignment of up to 4 zerglings to watch enemy bases, taking them from other duties. It’s reasonably low. To pay that back, burrowed zerglings have to gain intelligence or delay enemy expansions. A few opponents, like Tscmoo, know what to do about burrowed zerglings and send detection and force. Even so, the intended expansion is delayed, and Tscmoo then starts the base immediately so that the zergling’s residual vision sees it and Steamhammer can react instantly. It’s already worth the cost. Other opponents treat a burrowed zergling the same as a spider mine, which is not always astute. XIMP sends a zealot to “trigger the mine” with no effect; the burrowed zergling continues to block the base until carriers fly over with an observer. It’s no better when terran scans and tries to kill the “mine” with an SCV. Some opponents don’t react and can’t deliberately expand at all; they are stuck until the zergling is removed by mischance. In many cases, I think Steamhammer would benefit by researching burrow earlier. There is virtually no effect against zerg, because by default the strategy boss researches burrow when Steamhammer has 3 bases, and that is late game in a ZvZ.

A couple issues limit effectiveness. First, the zergling unburrows when it knows that it is detected—and then it forgets and reburrows at once, going into a loop. The intention was to stand up and fight or flee when necessary, but there was a bug. Second, in an emergency when all other zerglings are killed, the last watching zergling unburrows and races home to join in the defense. But one zergling running in from afar barely affects the fight, and the enemy becomes free to expand without hindrance. After seeing games, I concluded that it will be more effective to leave the last watcher in place. Both issues are fixed in the development version. Overall, this is a low rate of errors compared to other new features I’ve made; care in testing paid off.

Against some opponents, the Watch squads do little good and represent mostly cost. The best example is Tyr protoss, which against Steamhammer plays one-base cannon defense into timing attack. When the attack comes, it includes an observer and the oncoming steamroller incidentally rolls up the zergling burrowed in the natural. Steamhammer pays the cost, and Tyr bypasses it with no effort. Blocking later bases sometimes helps, though. Another example is Iron, which likes to build turrets before it starts the command center. The burrowed zergling at most gets to see a turret or two. At some point I will put the Watch squads into the upcoming opponent model skill system and have Steamhammer collect data on how well they work. That will help Steamhammer research burrow at the right timing, as late as possible while effective against this opponent, and never if it is never effective.

I have more uses in mind for burrow. In particular, I want to use it to protect drones from some attacks. Reaver drops usually don’t include an observer, so when the reaver lands, the drones should poof out of sight before they can be targeted. When the reaver is picked up, the drones casually reappear and continue work. That will be funny to watch.

inferring enemy tech buildings

You see an enemy unit. Sometimes it tells you what else the enemy has; for example, if you see a marine, you know there is a barracks even if you haven’t seen it. Drawing the inferences makes it easier to figure out the opponent’s plan. I thought it would be trivial to calculate the inferences, since BWAPI provides UnitType::requiredUnits() that tells what you need to create a unit of a given type. But it took me some head scratching; inference does not equal creation in reverse. Here’s what I ended up with. I edited the code slightly for readability; the real version is a little more obscure.

The code should be close to correct, and it works in tests so far, but I won’t be surprised if I’ve missed cases. There are a lot of cases.

// Trace back the tech tree to see what tech buildings the enemy required in order to have
// produced a unit of type t. Record any requirements that we haven't yet seen.
// Don't record required units. An SCV is required for a barracks, but don't count the SCV.
// A hydralisk is required for a lurker, but it is used up in the making.
void PlayerSnapshot::inferUnseenRequirements(const PlayerSnapshot & ever, BWAPI::UnitType t)
{
    if (t == BWAPI::UnitTypes::Zerg_Larva)
    {
        // Required because BWAPI believes that a larva costs 1 gas.
        return;
    }
    std::map<BWAPI::UnitType, int> requirements = t.requiredUnits();
    if (t == BWAPI::UnitTypes::Terran_Vulture_Spider_Mine)
    {
        requirements[BWAPI::UnitTypes::Terran_Factory] = 1;
        requirements[BWAPI::UnitTypes::Terran_Machine_Shop] = 1;
    }
    if (t.gasPrice() > 0)
    {
        requirements[the.enemyRace.getRefinery()] = 1;
    }
    for (std::pair<BWAPI::UnitType, int> requirement : requirements)
    {
        BWAPI::UnitType requiredType = requirement.first;
        if (!ever.contains(requiredType))
        {
            if (requiredType.isBuilding() && !UnitUtil::BuildingIsMorphedFrom(requiredType, t))
            {
                unitExists[requiredType] = true;
            }
            inferUnseenRequirements(ever, requiredType);
        }
    }
}

The code recursively traces back all the requirements to the root of the tech tree, if necessary. If you see an arbiter, you may learn about the stargate, the arbiter tribunal, the templar archives, the citadel, the core, and the gateway. In practice, an early scout which is turned back by a dragoon and sees nothing else concludes that protoss has a gateway, assimilator, and cyber core. It should infer a reaver from a scarab and a carrier from an interceptor. An opponent plan recognition rule does not have to say “if they have a cyber core, or some unit that requires a cyber core...” it can say “if they have a seen or inferred cyber core....”

The parameter ever remembers what enemy unit types we have ever directly seen, at any time in the game, even if all the examples have been destroyed since. That is because, if you see a vulture, all you know is that at some point in the game a factory existed to make the vulture. You have to remember. ever is filled in at the beginning of the game (or at the latest when we see the first enemy, if they went random) with the units that exist at the beginning of the game: The resource depot and worker types, plus for zerg, the larva and overlord types. That prevents loops: According to UnitType::requiredUnits(), it takes a nexus to create a probe and it takes a probe to create a nexus. True, but you have to ground the recursion!

Notice the bit !UnitUtil::BuildingIsMorphedFrom(requiredType, t): A lair requires a hatchery, but that doesn’t mean that when you see a lair you can infer a hatchery somewhere on the map. You can only infer the spawning pool. I think this serves essentially the same purpose as UnitType::isSuccessorOf() in BWAPI 4.2.0, but I haven’t switched yet. Non-building units are tricky to infer without isSuccessorOf(), so I didn’t. I don’t try to infer the vulture from the spider mine. A sunken colony requires a creep colony, but the creep colony disappears. An archon requires 2 high templar, ditto.

I filled in a couple of special cases. Spider mines: As far as UnitType::requiredUnits() is concerned, even though spider mines are units, they do not require units to create but only tech. Gas: If we see anything that requires gas, infer a refinery building. It may help early in the game. I haven’t tried to draw inferences from tech. You should be able to infer a control tower from seeing a cloaked wraith, an academy from seeing a scan occur, a lair from seeing a lurker, and so on. But one step at a time!

blocking expansions

Today I wrote about a dozen new burrow openings (mostly easy variations of existing openings). If burrow has many uses, there should be many timings to get it at. I also made a first pass at resource tracking, so that Steamhammer can finally stop expanding to bases which are mined out—and also as an input for strategy decisions. The last seen mineral amounts are a starting point to estimate the enemy’s total minerals mined, which is valuable for figuring out what they’re doing. It worked on the first try for minerals; vespene geysers are more complicated. I figure that just after a tournament deadline is the ideal time to add new basic infrastructure.

blocking an expansion

What is the ideal place for one of your units—a spider mine or a burrowed zergling or a pylon or e-bay in blocking position—to block an expansion? Steamhammer uses the center of the resource depot location, and as far as I’ve seen so do all other bots. But play a game against the built-in AI and burrow a unit there: It cheats and knows about the burrowed unit, and simply offsets its resource depot to avoid it. Krasi0 also has the skill to offset its resource depot, it just has to scan first. Mining is less efficient, but the base does go up.

Maybe the ideal place is one that forces the opponent to offset its building as far as possible from the right location. If the minerals are in a line to (say) the north of the base location, then let your blocker overlap the southernmost row of tiles where the resource depot should go. That forces a displaced resource depot as far from the minerals as possible. Similarly for the geyser. In a circular base layout, as found in the center of some maps, one or two burrowed units could block the entire circle.

I’ve seen pros place blocking buildings off-center like that to dissuade the opponent from displacing their resource depot. A bot could do a search to find the placement that forces the depot as far as possible from minerals and gas. The answer is different for a spider mine or burrowed zergling than for a building.

There are other considerations. The blocking unit provides vision; maybe you can place it so that it sees everything that comes down the enemy ramp. For a pylon, maybe you want to put it as near the natural choke as possible so that you have a better chance to send units in to defend it, or to use it to power a gateway or shield battery that might be out of enemy sight. That kind of thing.

Eh, not a big issue for any bot. But it reminds me how complicated the game is. In the long run, we have to seek methods that can weigh many considerations—and nothing stops us from seeking the methods now.

timing the Styx build and variants

Here’s a table of variants of the Styx build. The left one, 7 drone hatchery first, is the original; the other 3 are natural variations. The story from Dan Gant is that an entire population of machine learning agents all converged on the original build, so according to those agents, it’s the best choice. I won’t accept their opinion without checking. Steamhammer, of course, includes all 4 of these builds, and has additional decorations beside.

step7 drone
hatch 1st
7 drone
gas 1st
8 drone
hatch 1st
8 drone
gas 1st
15 x drone (9 total)
2spawning pool
3drone (back to 9 total)
4extractor trick (10th drone)
5overlord
63 x zergling
7hatcheryextractorhatcheryextractor
8extractorhatcheryextractorhatchery
94 x zergling2 x zergling4 x zergling2 x zergling
10metabolic boost (zergling speed)
11keep making zerglings

The 4 variants differ in 2 features. Feature 1: The 8 drone variants, on the right of the table, throw in an extractor trick (step 4) to get an additional drone, leaving the zerg with 8 drones mining at the end of the build rather than 7. Feature 2: You’re making both a hatchery and an extractor, and you can make them in either order (steps 7 and 8). Hatchery first means the hatchery finishes a little earlier and may be able to raise the zergling count a little. There are also timing effects because of the different number of zerglings made (step 9) before starting zergling speed (step 10).

The machine learning agents concluded that the leftmost build is best. My intuition is that the rightmost build is best: The extra drone from the extractor trick doesn’t help at first, but provides more flexibility in the long run (in case you don’t win outright). Getting gas before hatchery barely delays the hatchery, because the extractor does not finish before the hatchery starts, but gets zergling speed significantly earlier, which I feel outweighs the couple extra zerglings you may gain by getting hatchery first.

I’m not trusting my intuition without checking, either. This post is about measurements. I can measure timings. I can’t measure which variant is objectively stronger, because it depends on the skill of the player. PerfectBot is not available to tell us. Are you better at taking advantage of zergling numbers, or zergling speed?

All tests were run on the map Heartbreak Ridge. I didn’t use Steamhammer’s existing builds, but wrote special ones to reduce variance. Each build calls for exactly 40 pairs of zerglings. There is no drone scouting. The second hatchery goes in the main base because long drone movements will vary more. Overlords were inserted by Steamhammer’s usual method, which is heuristic but consistent. Zerglings stayed put and did no fighting so that overlords were made at predictable points; I disabled the Recon squad and convinced the opponent to also stay home. Building placement is different between the 2 starting bases on the map, so I only timed games from the 9 o’clock base. Zerglings gathering around the main hatchery interfered with drone movement when placing buildings and caused variations in the timings, so I had them gather at a distance. I recorded data for 5 runs of each build.

Zergling speed timing: The frame when metabolic boost finished upgrading. The gas-first builds get zergling speed over 330 frames faster, around 14 seconds at 24 frames per second. That’s a long time during a game, but don’t forget that it is only a window of opportunity. If there is any advantage to be gained by a gas-first build, it must be gained during that interval. With hatchery first, the extractor trick to gain the 8th drone causes a 100 frame or 4 second delay, which is much more than I expected. With gas first, the extractor trick causes no measurable delay. Now that’s interesting.

buildmedianlowhigh
7 drone hatchery595559416003
7 drone gas562155915659
8 drone hatchery605560546092
8 drone gas562155945633

Zergling timing. For each build, I took the run with the median timing of zergling speed from above, and put only that data into these charts. The initial 6 zerglings happen after the extractor trick and before the hatchery/extractor decision, so only the 7 drone/8 drone division between the builds is meaningful. The numbers say there may be added variance in the extractor trick causing some delay on average, but no necessary delay. The 8th zergling (the fourth pair) comes after the hatchery and extractor and before zergling speed. For the hatchery first builds, zergling speed finishes after 22 or 24 zerglings have been produced. For the gas first builds, after 16 or 18 zerglings.

This scatter chart shows how similar the four variants are. The x axis is time, y is the zergling count. Blue is the original 7 drone hatchery first build. The other colors are visible a bit around the edges of the blue. The initial 6 zerglings appear at the lower left in a column. There are visible gaps where overlords are made.

scatter chart with very little scatter

Here is a more useful visualization. I subtracted the blue timings from each build and plotted the residuals. A point above the horizontal zero line means that that build was later than the 7 drone hatchery first build to reach that specific zergling count. A point below the line means it was earlier. The vertical axis gives the frame difference. 40 points are plotted for each build, one point for each zergling pair from 1 to 40.

scatter chart with very little scatter

The original blue build is quite good at pumping out lings. It is ahead of the others at more timings than not. But every build is ahead at some timings. The regular spikes are related to overlord spawning. If you are fighting hard you will not need to make overlords, and the results may be different. You can think of each timing when a build is ahead as a window of opportunity, and compare the zergling count windows to the zergling speed window of 14 seconds for the gas-first variants.

Extra minerals. The 7 drone variants are just about perfectly tuned to balance mineral income and larva production from 2 hatcheries. After starting 40 pairs of zerglings, less than 50 minerals are on hand and the larva count is 0 or 1. That means that the 8 drone variants cannot gain an edge in zergling production, even in the long run. Instead, the 8th drone allows flexibility in case the build does damage but does not win outright; the player has more resources to switch into another line.

After starting 40 pairs of zerglings, the 8 drone variants have banked about 400 minerals. Normally, you’d prefer to spend them before getting that far. One idea is to spend the minerals on a sunken—perhaps an offensive sunken against zerg. Another is to add a third hatchery, pause zerglings briefly to make a few drones to keep the hatchery fed, and go back into zergling production at a higher rate. Another is to put the 8th drone on gas and prepare to suddenly switch into a tech build.

Steamhammer scouting thoughts

Good scouting is a prerequisite for strategy adaptation, and right now Steamhammer’s scouting skills are mediocre.

The ScoutManager controls early game scouting. In the original UAlbertaBot, the scout manager controls the worker scout. Steamhammer extends it to also control one overlord—and that’s all. It coordinates the two units to scout efficiently, but it can’t make use of the zerg’s second overlord, much less any other unit. Furthermore, the scouting paths don’t extract as much information as possible. When the scouting overlord arrives, it sits in one place and has no chance to see buildings started far away. The scouting worker does explore the base, but doesn’t evade defenders and often gets stuck on buildings. The enemy natural is scouted incidentally, if at all.

Steamhammer scouts in the middle game with its Recon squad, a small group of combat units that visit empty bases to see if perhaps they are no longer empty. The squad attacks any undefended buildings or weak enemies that it happens across, and the behavior of zipping across the map in every direction incidentally finds and interferes with a lot of enemy activity that would otherwise go unnoticed: Enemy scouts, abandoned proxy buildings, worker transfers, isolated reinforcements.... The Recon squad is effective, it doesn’t need any changes for now. But it should not be the only form of middle game scouting.

Steamhammer does no deliberate scouting of known enemy bases (after the early game scout), or of possible enemy movements (ever). It sees the enemy move out because its army is normally trying to push forward as far as it can, and it learns what is in the enemy base when an attack reaches that far (or occasionally when it parasites a unit that returns home).

There is a connection with overlord safety. Steamhammer does not know that most maps provide overlord posts where a correctly positioned overlord can safely watch passing enemies. Wraiths or corsairs spoil the party, but until then overlords can ordinarily see when the natural is taken, and see enemy units move out, and spot them as they pass key points, without danger and often without being seen in return. I don’t know of any bot that takes proper advantage of overlord posts.

what do do?

Some bots have a thing like a scout squad: If you want to look around the map, throw whatever units you prefer into the squad, and the squad coordinates them. That’s a step up in generality from Steamhammer’s scout manager.

The scout squad has decisions: Run around the map, or post units at key locations, or some of both? Just look, or harass or fight when it makes sense? If planning to fight like the Recon squad, how big should the groups be? For example, when a pro scouts with scourge, they commonly send 2 scourge, and if a corsair shows up, the scourge have a point to make. The simple scheme of dispatching individual units around the map doesn’t do everything you’d like.

I’m thinking of implementing scouting with 2 squads plus a scout boss that can hand off scouting goals to other squads.

The Recon squad would be little changed from now.

The Watch squad would be responsible for watching over key points with more or less stationary units. It might post single zerglings in likely enemy expansions, or set units to oversee choke points. Like the Recon squad, it would feel free to fight when it saw an advantage—you want to expand here? Fine, see if your probe can beat my zergling. The Recon squad would only visit bases that are not being watched. The size of the Watch squad might be 1 zergling early, and it might replace the Recon squad entirely later in the game. Steamhammer already has some code for the Watch squad, but it’s not in a usable state.

The Scout Boss would maintain goals: A set of things that we’d like to find out if we can, with priorities. At the start of the game, the goals would be to explore starting bases to find the enemy. When the enemy is found, some goals disappear and new goals appear to seek out what the enemy is doing. Later in the game the set of goals could become extensive—we saw a zealot at (x, y), is it still there? Ideally, in Candide’s best of all possible worlds, the Scout Boss should be smart enough to tell when it is worthwhile to sacrifice a unit for more information: How big is the enemy army? Run one zergling in. How many barracks are in that base? Sacrifice an overlord to find out.

A Scout squad can ask the Scout Boss for its goals. So can other squads. When Steamhammer’s mutalisks back away from an over-strong enemy force, they assume that the force will stay there and they remain backed away, wasting time doing nothing. The Scout Boss will want to know where that force goes, and can prompt the mutalisks to return and look. Or the Scourge squad can accept scout goals, and the Scourge squad has the knowledge that scourge should commonly fly around in pairs—or in triples if expecting scouts, something a general scout squad should not have to understand. (2 scourge kill most flyers, but a scout needs 3.)

Anyway, that’s the line I’m thinking along. Maybe I’ll start on it in January.

Soon: Analysis of the Styx opening and variations.

fun game Simplicity-Locutus

Yesterday’s game Simplicity vs Locutus on Andromeda on BASIL starts out as one of the most entertaining bot games I have seen. The pictures show some of the cool stuff that Simplicity tried—with success. Then, after a tremendous fight where each side pressed temporary advantages and maxed its army, the replay loses sync and OpenBW cannot show the last half of the game.

Queens with broodling. The Research tab shows broodling research, and there are broodlings on the ground. Simplicity made 8 queens early and even researched queen energy, and the queens paid for themselves with interest. When Locutus attacked, zerg sent out as many queens as had energy to simultaneously spawn broodlings, helping to break the attacks. It’s a simple way to coordinate the queens to get tactical results, and is more effective than the common bot approach of using the queens as attrition weapons. Simplicity’s queens eventually died to corsairs; with more careful play, they could have lived to the end of the game, because Locutus was not skilled with its corsairs.

Broodlings!

Island base with static defense. The overlord on the left has just dropped off another drone to join the miners.

Island!

Drops. Simplicity repeatedly dropped small numbers of units into the far end of Locutus’s base, and Locutus did not react properly. The drops were not decisive, but were cost-effective.

Drops!

Both sides maxed their supply, or nearly so. At that point, Locutus had better upgrades but Simplicity had a larger army. Locutus could not keep its natural safe. Luckily for protoss, it was already mined out.

Mass battles!

But Locutus had a stronger economy with more bases and a large bank of resources, and Simplicity ran out of resources. The desync hides the end of the game, which timed out after an hour. I believe that Locutus wiped out all zerg it could reach on the ground, and then had no answer for the island base. When the game timed out, BASIL gave the win to Simplicity on points. Moral: You need at least enough island skills to make air units to attack inaccessible bases.

Steamhammer can’t finish the game

Finishing off the enemy just means destroying all their buildings. It sounds simple, but it is a sophisticated skill, and there are a lot of ways to go wrong. Steamhammer has a number of special provisions for quickly finding the last enemy remnants, but small loopholes persist and occasionally a game slips through one.

PurpleSpirit-Steamhammer on La Mancha is an example. It’s an entertaining game, thanks to the purple habit of playing all over the map, but I want to focus on the end, after PurpleSpirit has lost, when Steamhammer fails to destroy the floating terran buildings that are right over its head. That part is entertaining too, but not for the same reason.

the beginning of the end

Everything terran on the ground is destroyed, except one command center which was infested instead. The remaining terran force is 2 full-strength battlecruisers, and the remaining terran infrastructure is 2 floating ebays. Steamhammer is maxed and banking resources, but its only anti-air units are 8 scourge, plus a defiler with plague. Notice how much game time is left?

One of Steamhammer’s special game-finishing skills is that it makes mutalisks to chase down the residue of the enemy. The condition is, if the enemy has no known bases and no known anti-air units, then Steamhammer will tech to mutalisks and make mutas its primary unit. The mutas scout faster than ground units, and can find floating buildings and island bases that ground units can’t reach. But here terran still has battlecruisers, so the mutalisk rule does not kick in. First the terran army, such as it is, must be defeated.

swarm all over

Some scourge have hit, and the battlecruisers are no longer at full HP. But Steamhammer has been replacing losses primarily with more zerglings and ultralisks, which are of no use. Oops, the unit mix is wrong. Now there are only 2 scourge, and a battlecruiser can kill a scourge in one shot—2 battlecruisers, if not distracted by other targets, are safe from 2 scourge. The ebays choose to park over the terran natural, and zerg units have congregated there. The battlecruisers seek zerg stuff to shoot, and the defiler responds by blanketing the area in defensive swarm, consuming zerglings like crazy.

some damage has been done

Well, the 2 scourge hit one of the battlecruisers, which was distracted seeking zerg units that strayed from under dark swarm. And Steamhammer is now making 3 new pairs of scourge to replace various losses; if it can keep this up, the battlecruisers will eventually fall. Best of all, the defiler has plagued the terran buildings, despite the zerg units underneath. That will put the ebays into the yellow. One more plague should put them into the red, after which they will burn down.

nothing happens after this

Whew, finally the battlecruisers are shot down by scourge.

But that’s all she wrote. The swarms wore off and there was no need to renew them. The defiler did not plague again because it thought the zerg units underneath were more valuable. Scourge are coded to avoid floating buildings, because it is usually wasteful to spend gas destroying them. The mutalisk rule is engaged, and there is supply to build 1 mutalisk, but Steamhammer happened to choose to spawn zerglings first, and after that there was no supply to make a mutalisk. The game timed out with no more progress.

Finishing off the enemy can be hard. In this case, Steamhammer had the wrong unit mix; to make zerglings and ultralisks when all enemies were in the air was no good. The mutalisk rule should make mutalisks only, not mix them with other units. The scourge might have understood that when only floating buildings are left, they are good targets. Also the zerg ground units that can’t shoot up might have known better than to chase floating buildings (though it can be useful when they track a building trying to escape), and the defiler might have realized that damage to its own units was irrelevant when it could eliminate the enemy. That is a lot of flaws, and yet Steamhammer rarely fails to finish a game!

And fixing all the problems would only narrow the loophole, not eliminate it. In the worst case, Steamhammer would need to be able to destroy some of its own units to clear supply to make mutalisks to finish off the enemy. And that’s a high-end skill that I am in no hurry to add.

Next: The start of CoG 2019 analysis.

Steamhammer’s defiler play

Earlier I claimed that if Steamhammer has defilers out, it is probably winning. It’s true but misleading. Steamhammer’s game plan is such that it doesn’t try to win in the middle game (though it may win accidentally); the midgame is about holding the enemy off, getting upgrades, and growing the economy. When its drone count reaches 75, Steamhammer switches to all army production and its military strength grows rapidly—and that is the same time that defilers come into their own. When it reaches the late game, whether there are defilers or not, Steamhammer will be hitting hard and very likely winning, because if it weren’t winning it would probably have lost already. The late game is Steamhammer’s strongest phase.

Nevertheless, Steamhammer’s defiler usage has grown skillful enough that it definitely contributes to the bot’s strength. It’s an important milestone, because good defiler usage is critical to strong zerg play. Defilers are complicated, and zerg cannot reach its potential without mastering them. Steamhammer is far from mastering defilers, but I think it has become more adept with them than any other bot.

The original description of the defiler implementation is still accurate. Bugs have been fixed and refinements made, but the structure is unchanged.

that laser precision

I picked this game TyrProtoss-Randomhammer because it shows off Steamhammer’s precision and fluidity in defiler spellcasting. The precision was always there; the fluidity was reached by a long road with a year’s worth of bug fixes and other improvements. In the first picture, Steamhammer is about to start its decisive final attack. The attack would have won with or without defiler support. Accurate defiler spells made it effortless.

a slightly weak plague

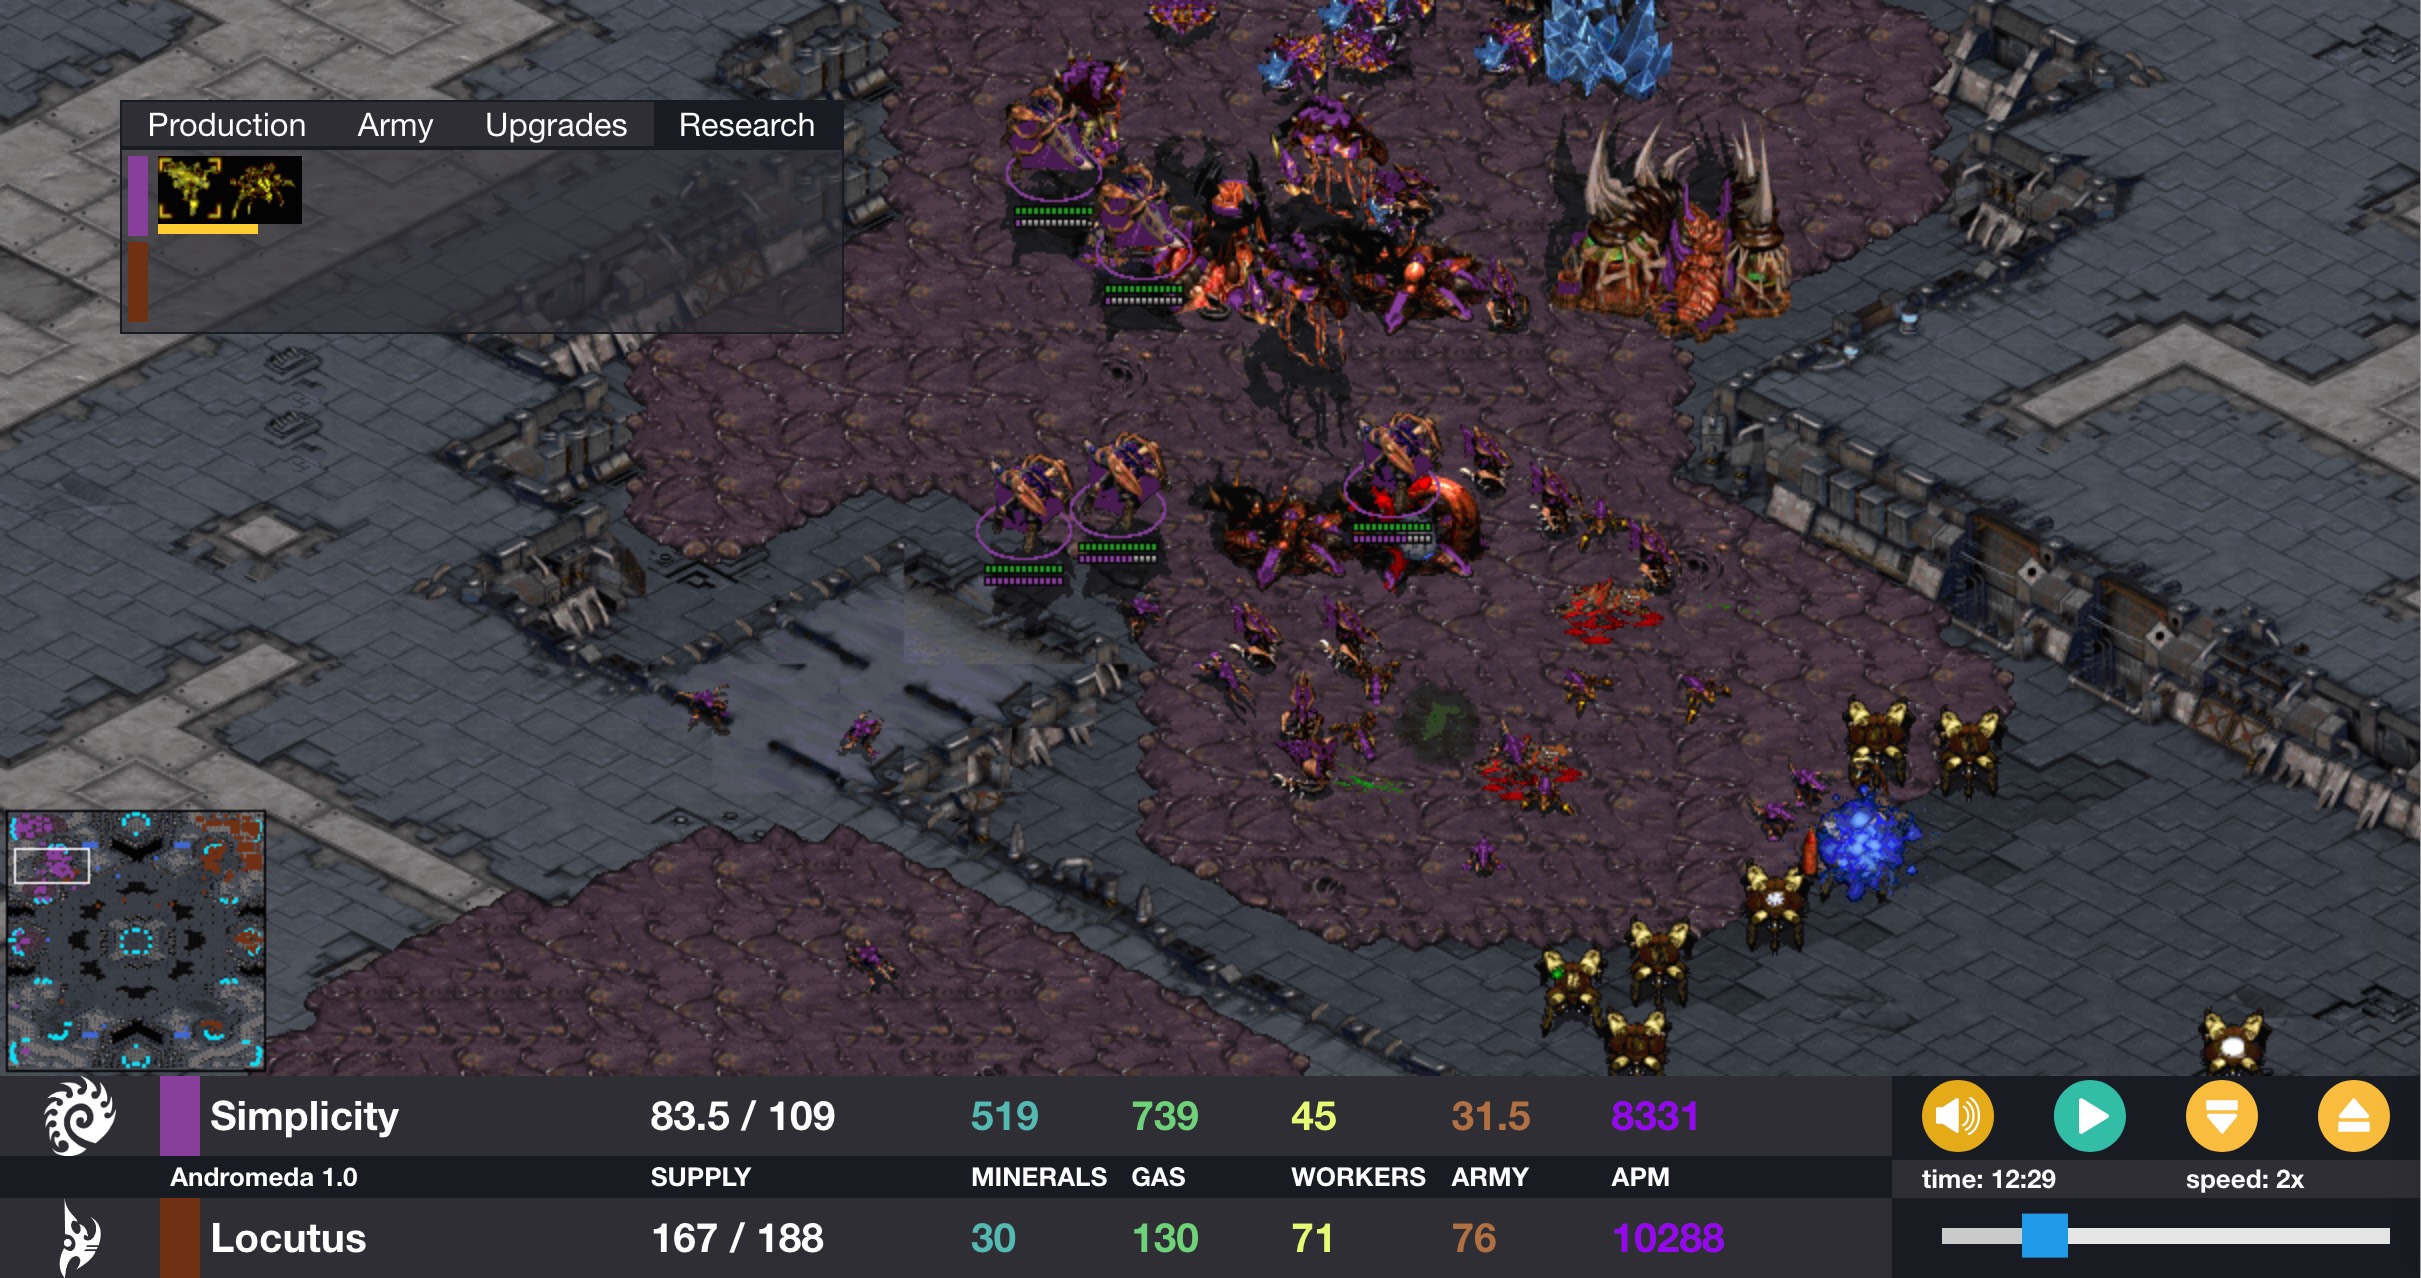
Steamhammer chooses plague because it looks like the fight will feature zealots versus hydras. The plague is actually a little weak. The defiler (selected and a little hard to see) is hemmed in by friendly units and cannot move forward, and Steamhammer hasn’t seen all the approaching enemies yet, so it plagues only 3 zealots. With a short delay for the opposing armies to close, it could have plagued more enemies, but it is not able to figure that out. Still, the plague helped in the battle.

swarm neutralizes the dragoons

Once the front zealots have died, Steamhammer has a fuller view of the situation, and realizes that the enemy has mostly dragoons left. The defiler (which has the energy upgrade) casts swarm, consume, consume, then a second swarm. The swarms are accurately placed to nullify the dragoons and drive the enemy back, bringing the fight into the natural. In the picture the defiler has just cast the second swarm, and it instantly consumes again.

plague hammers in the final nail

The defiler is again stuck behind friendly units for a time, but protoss is forced back to the ramp. As zerg units spread out to raze the enemy natural, the defiler becomes free to move and drops a perfect plague on the ramp. Every protoss unit on the ramp is hit, and the zerg melee units that are in contact are untouched. No better plague is possible.

Steamhammer is awkward in maneuvering its defiler, and it is unable to foresee better opportunities that will arise in the near future. But when a spell goes down, it is often close to the best that is possible at that moment. It’s plenty good for now.

potential to turn the game

One defiler spell can make the difference between losing and winning. In practice, Steamhammer needs more skills before that will happen often in its games, but the examples here offer a foretaste. The game Steamhammer-McRave I picked to show the brute power of plague.

The first defiler of the game wandered carelessly into the front lines, stood on top of an isolated lurker, and got stormed to death. The defiler didn’t know the best place to go, that’s one weakness, and Steamhammer only makes 1 defiler at a time, that’s another weakness. An alert opponent can pick off the defiler and earn a respite. When the second defiler of the game joined the fray, this happened:

a plague on all your zealots

It’s a fun game, worth watching through. At the time of the picture, Steamhammer had been slowly twisting the situation into its favor from far behind, but McRave was still winning. The game could have gone either way. After this massive plague, turning a whole phalanx of zealots into straw, McRave’s army was broken and it quickly collapsed.

Here’s a picture from a different Steamhammer-McRave game. The red stuff all over the protoss natural is from 3 active plagues cast one after another by one defiler. The defiler just died; it sacrificed itself amidst the zealots (at the white spot of a dragoon hit) to get the third plague off, the one currently spreading over dragoons in the rear. The sacrifice was worth it. The protoss army was hollowed out, giving zerg time to consolidate an economic advantage and win. Without those plagues, McRave would have been able to move out and take the game with its bigger army (though I’m not sure it would have chosen to).

plague of plagues

Here is a third example of a turnaround plague, from Steamhammer-MadMixT. After playing well much of the game, Steamhammer went astray and collapsed under a terran attack. It was about to lose its main and the game when a defiler risked its life to throw a plague over the core of the terran force, reducing the units to eggshells. Plague hurts terran more than protoss, which has shields. It then took only a few zerg units to clear the attack, partly due to terran’s disorganized movement, and with a return to superior play, Steamhammer slowly clawed its way to a win.

eggshell terrans

keeping active

Steamhammer is weak at using defilers in defense. I think it’s the widest remaining gap in defiler play. But it’s pretty good at using defilers in attack. I chose the game Steamhammer-MadMixP to show how, in the best case, Steamhammer can keep its defiler active through a long attacking sequence. The game itself is not very interesting, but watch the finishing attack which starts at around 17:30 from across the bridge to the terran natural.

the finishing attack begins with a plague

It starts with a plague. If I didn’t miss anything, the sequence that follows is consume, consume, swarm, consume, consume, consume, plague, consume, consume, swarm, consume, consume, swarm, consume, consume, consume, swarm, consume, plague, consume, consume, consume, plague, consume, consume, consume, plague, consume, consume—and the last enemy building is destroyed. The defiler was stuck behind friendly units for short stretches, and otherwise busy every moment supporting the raging attack. Even though not all the activity was useful, the ability to keep constantly active is valuable.

blunders

Steamhammer does make mistakes in casting defiler spells, though rarely serious ones. Plague doesn’t account for moving units. It can miss fast-moving enemies altogether, for example trying to plague a group of corsairs and smearing only bare ground. In an active fight it can unintentionally plague its own units, which do not realize that they are moving into a danger zone. (It’s also perfectly willing to intentionally plague its own units, if that lets it splash more enemies. The calculation simply adds damage done to enemies and subtracts damage done to self.)

Dark swarm is thorny. Steamhammer only partially understands it. In Randomhammer-tscmoop2 the defiler cast a swarm that helped the enemy—with hydras on hand versus zealots and a reaver as well as the cannons and dragoons, swarm was a poor idea in the first place, and this swarm placement defends the enemy and does not open a path to attack. Oops. The research tab shows that plague was almost but not quite finished.

swarm protects enemy units

improvements needed

Why is Steamhammer weak with defensive dark swarm? To lay down swarm over lurkers and hold a position, or to force marines back with zerglings under swarm, you have to coordinate the swarm with the combat units. The defiler knows that swarm over lurkers is a great idea, and the combat simulator knows it too, in an approximate way. The lurkers themselves have no inkling; when their targets retreat, the lurkers will pick themselves up and obliviously step out of the swarm and die. Even something as simple as rendering hydralisks invulnerable to air attack is beyond Steamhammer. The hydras pay no attention.

Steamhammer’s squad code is already fragile from having too many skills tacked on, and needs to be rethought and rewritten. I’m reluctant to add complicated coordination skills before tackling that, so this weakness will likely be around for a while. It is a severe weakness, though, because defense is a critical use of defilers. Darn it, but there are times when only invulnerability can save you.

Besides the lack of coordination, there is no planning ahead. Defilers live in the moment and know nothing beyond. With prediction and planning, greater things could be accomplished with fewer resources.

More basically, the tendency of the defiler to get stuck behind friendly units reminds me that Steamhammer needs another fundamental skill: Smooth unit movement. Human players know that the defiler’s position is important, and move other units so that the defiler gets where it needs to be. And more generally, the missing skill shows in things like awkward movement through choke points, and clumsy collisions when squads cross paths.

I have a few simple ideas for how to control multiple defilers at once without blowing out cpu usage or seeing them simultaneously plague the same enemies. I expect I’ll implement that before SSCAIT this year. With 2 or 3 defilers in the Ground squad, defenders won’t have time to draw breath between spells.

Someday I’ll implement defiler drops. Zerglings with adrenal glands upgrade might as well be wrecking balls. Drop a defiler and some zerglings off to one side, swarm, swarm, and pick up the defiler for another go later while the lings rip down buildings. It’s cheap to do and expensive to defend against.

cancellation and destruction

If you cancel a unit, or cancel research for tech or for an upgrade, you get back its full cost in minerals and gas. Some bots know how to cancel a zerg egg if it is about to die, to save the cost. For example, Steamhammer cancels eggs, lurker eggs, and guardian/devourer cocoons that are very low on hit points (not the ideal criterion, but it helps).

If you cancel a building that is under construction, you get back 75% of the original cost in gas and minerals, rounded down to the nearest integer. Buildings tend to be expensive, so many bots cancel buildings that are about to be destroyed. If a terran SCV is killed while constructing a building, the player should either dispatch another SCV to finish the building, or cancel the building, depending on the situation; it’s not an easy decision. If the building is destroyed before it is completed, which is easier because it doesn’t have all its hit points yet, you lose the full value.

But these are not all the cases!

If a building is carrying out research when it is destroyed, the research is cancelled by force majeure. You get back 75% of the research cost, again rounded down. Do any bots cancel research when a tech building is about to be destroyed? Steamhammer does not (yet). You save 25% of the research cost, which is not much, and you accept a risk that the building might survive (maybe the enemy will stop shooting it), and you’ll have canceled for nothing.

If a building is producing units when it is destroyed, you are refunded the full cost of the units. It’s the same whether the unit is actually in production, or is queued behind other units for later. There is still a theoretical advantage to canceling pending units that will not be produced, though. It returns the resources sooner (minerals, gas, and supply), which might be valuable if you are resource constrained and can use the resources another way.

The refund for pending units of a destroyed building is an advantage for terran and protoss (though not a big one). Zerg has to worry about canceling eggs and cocoons, and must accept the risk of canceling incorrectly versus losing the unit for nothing.

insanitybot can drop

The latest insanitybot update is able to carry out drops. The author seems to be systematically adding All The Features. Here’s a typical drop game, insanitybot-WillyT. Insanitybot plays a battlecruiser rush (compare PurpleSpirit’s battlecruiser rush), and follows up with a vulture drop.

I think insanitybot performs a drop in most of its games which go over 10 minutes. There are plenty more examples.

The drop feature is clearly leaning on the limited support for drop in insanitybot’s parent Steamhammer. The drop is a usually vulture drop, just like Steamhammer’s terran drop, and the dropship follows the same path around the edge of the map and unloads in the same location. Notable differences from Steamhammer’s drop skills are: 1. If there are no vultures, the dropship will carry marines instead. Are there other possibilities? 2. The drop is a middle game behavior, rather than being coded into the opening. 3. Insanitybot can lay mines, so spider mines may end up in the enemy base. I notice that the drop location near the mineral line is not ideal for laying mines, though. 4. Insanitybot attempts to set up for another drop. The dropship comes home after the drop, and sometimes picks up new units. If the dropship dies, another is eventually made. I have yet to see the second drop land, though.

The game insanitybot-Gaoyuan Chen is a highly effective marine drop. The dropship returns home and starts picking up fresh marines, but the marines are more interested in the fight in front of them than in the distant enemy base. The dropship is finally shot down before it can make the second drop.

Drop in the general case is of course a very complex set of skills. There are cliff drops (Icebot and SAIDA can drop tanks on a cliff), mixed unit drops (marines and medics are good), not filling the transport (to reduce the loss in case it is shot down, or to speed up the drop timing; it is normal for protoss to load only 2 dark templar into a shuttle, for example), multi-ship killing drops versus harassment drops, good play after dropping (lay mines in front of the enemy gateways, for example), changing the drop point based on new information (the dropship may fly over an unscouted enemy base), scanning the drop zone to make final plans (“ack, turn back, it’s well defended!” or “I only see zerglings, let’s go behind the minerals so we’re hard to reach”), and so on. Then there is coordinating the drop with other actions. In pro games, it’s common to escort the dropship across the map, load up near the destination, and carry the troops only a short distance. And there are tricks to draw forces away from the drop zone, or to use the drop to draw forces away from the front. It’s far more than any bot can do, for now. Another way to say it is, there are plenty of ways available to surprise your opponents in the next tournament.

What’s next for insanitybot? I think there are still some terran skills to add, but not that many!

defeating undetected enemies

An enemy lurker or dark templar is in your base, and you have absolutely no form of detection nearby. Can you defeat it anyway? In many cases, yes.

An enemy unit can be in sight range but undetected if it is burrowed—a spider mine or a burrowed zerg unit—or if it is cloaked—a wraith, ghost, dark templar, observer, or a unit under an arbiter’s cloaking field. I’ve written before about countering spider mines, so I’ll skip that.

burrow versus cloak

When a cloaked unit is in sight, a bot knows where it is. Without detection the cloaked unit cannot be targeted, but BWAPI gives its type and position.

A burrowed unit does not give itself away. If the bot did not see the enemy burrow, and did not detect it since it burrowed, then BWAPI does not reveal that it is there. Exception: A lurker can give away its position when it attacks. The lurker spines are a bullet, in BWAPI parlance. However, if you try to build on top of a burrowed unit, construction will fail. Many bots use that fact to infer that a spider mine is blocking an expansion position, but the principle is general. In theory, you could locate burrowed zerglings by starting buildings in different positions. It’s rare, but I have seen a game where hold lurkers waiting in ambush in an expansion were discovered by trying to build a turret before any mining SCVs arrived.

spider mines

Spider mines will attack cloaked enemies. They are popular for fending off dark templar.

splash damage

An undetected unit can’t be targeted, but it can be hit by splash damage. Psionic storm is the simplest way; burrowed and cloaked units are affected like any other. Nuke may be overkill, but is effective.

An example: For protoss, the most common way to deal with a single undetected lurker is to park a friendly zealot on top of the lurker and attack the zealot with an archon. The zealot will remain stoic as it takes full damage, and the lurker will take splash damage. You may need 2 zealots to finish off the lurker. Skynet by Andrew Smith has this skill, and I wrote it up in 2016.

Any unit or spell that does splash damage will work—well, it has to do ground splash for ground enemies or air splash for air enemies (archons do both ground and air splash). Besides archons, popular choices are reavers, lurkers, and sieged tanks. Corsairs and valkyries are good for air splash. Firebats and infested terrans can theoretically work, though I’ve never seen it done. You can also do the eraser: Irradiate a unit (preferably an air unit) and keep it next to a dark templar or ghost—but then, if you have a science vessel, you have a detector, so the eraser is for when you have no other forces around. Spider mines do not attack friendlies and are the only splash damage unit that cannot be used, but they do attack enemies so you don’t need to. Mutalisk bounce does not count as splash; glaive wurms do not bounce to undetected enemies. Also devourer acid spores do not splash onto undetected air units—they will reveal a cloaked unit that they are attached to, but they can only attach to a unit that is detected.

Also, any target that will splash onto the undetected enemy is good—anything directly next to the undetected enemy. Sometimes you can target a building or an enemy unit.

revealing cloaked units

The queen’s ensnare and the defiler’s plague are area effect spells that work on cloaked units, though not on burrowed units. Besides affecting cloaked units, the green or red goo reveals cloaked units so that they can be targeted.

EMP

Wraiths and ghosts need energy to cloak. Hit them with EMP, and they are forced to become visible. Of course, the science vessel can also directly detect them. EMP might be worth it if the vessel is at risk (perhaps from the wraiths, or perhaps from ghost lockdown), or if one EMP can hit a group of enemies which will then have to build up energy to cloak again.

drilling cloaked units

Sometimes you only need to gain a little time before you can deal with the cloaked enemy. You can delay the enemy if you can force one of your units to overlap with it; both units will move randomly, unable to act, until they separate. Zerg can do this by unburrowing from under the unit, or by turning a larva into an egg when the unit is very close to the larva. All races can do it with a worker drill: Send workers to a mineral patch so that their path will take them through the position of the enemy—mineral walk through the enemy—then stop or attack when they are overlapping.

Any other techniques? I won’t be surprised if I forgot a few.

a trivial rule of thumb for lurker targeting

One of the items on my list is good lurker targeting: Lurkers should aim for the target that will bring about the most total damage, with the lurker’s line of splash damage. In the current release, Steamhammer’s lurkers use the same targeting as most units, choosing the closest available target when other things are equal. It’s not so smart, but improving lurker targeting has been a low priority; the full analysis is more effort than it’s worth for the time being. Lately I hit on a simple idea to improve targeting without doing any deeper analysis. It’s a rule of thumb that I notice when I play myself, but for some reason I never thought of implementing it before.

Suppose a lurker is to choose one of 2 targets, and it knows how far away each is but nothing else. It has to choose blindly. Which target is the better choice? Does one of the targets offer a better chance of blindly landing splash damage on the other, with the lurker spines reaching out in a line? It might be counterintuitive, but geometry gives an answer: The more distant target is better. If you aim for the near target, the far target subtends a smaller angle from the point of view of the lurker. If you aim for the far target, the near target subtends a larger angle, so you are more likely to hit it by chance. If you don’t believe me, draw some circles on paper, or start up the game and try it!

The same reasoning works if there are 3 targets; pick the farthest. If targets are dense, it doesn’t matter where you shoot, and if targets are sparse and you do no further analysis, then aiming for the farthest is best. It’s dead simple, so I implemented it in Steamhammer, choosing the highest priority target at the greatest distance rather than the smallest distance. It is a small but real improvement, and it was hardly any effort. There is a disadvantage, which is that the more distant unit may be better able to sidestep the lurker spines, since it has more time to react. But not many bots dodge lurker spines.

Of course it’s much better to do the full analysis: For each target, calculate which enemies the lurker will hit and what the hit is worth. Ideally, predict how the enemy units will move, taking into account their likely decisions, and correlate their paths with the extending line the lurker spines will follow. And optimize the fire of all lurkers at a location as a group, so that they cooperate to kill more efficiently (2 lurker shots kill a marine, so these 2 lurkers should aim here and here to overlap their splash damage). It is an elaborate calculation, and I don’t think it’s worth the effort for now; better to improve Steamhammer’s other decisions first.

Steamhammer and queens

When I announced that Steamhammer 3.0 would be next, I forgot a step: I want to upgrade to BWAPI 4.4.o. I actually want to make a 2.3.1 release first with the upgrade. I think I can probably do it this month, along with other additions, even though I may not start the work until next week.

Just now I don’t feel like any serious work, so I started to implement queens. Queens are not essential; you can be a great zerg and never spawn one. Often enough, queens are not useful at all. But queens are fun, and I feel like doing fun stuff.

I’m starting with parasite, and I’m thinking the order should be parasite, then infest command center (you get both of these with no research), then ensnare, then broodling. I don’t expect to do them all at first, but I will eventually.

My initial plan is to always make 1 queen versus terran, if the situation permits, in hopes of infesting a command center. And to make 1 queen against protoss if Steamhammer spots juicy parasite bait, like a carrier. In ZvZ a queen is too expensive, unless maybe you can broodling defilers and ultralisks if the game goes that late.

In the longer run, I want Steamhammer to learn for itself which tactics work, and which work against each individual opponent. It should be possible to measure whether parasite brought in information, whether ensnare harmed the opponent, and so on, and estimate whether the queen and the research to use it paid dividends. Decisions based on data are better decisions.

parasite

Parasite is rare in pro games, though it has been used. If you have queens at all there is usually a better use for their energy. But bots are not as knowledgeable as pro players. Could parasite be useful?

I am going to try parasiting flying critters, on maps that have them, to see if it’s useful. And I’ll try parasiting expensive enemy units: Science vessels, battlecruisers, carriers, arbiters. I expect that a few strong terrans will react well, and the bulk of bots will not notice the parasite and will give Steamhammer free information. But we’ll see!

By the way, parasiting a science vessel is not too dangerous if done carefully. Irradiate has a range of 9 tiles, while a queen has vision range 10 tiles, so a queen that approaches cautiously has good chances to launch a parasite without getting irradiated. Parasite has range of 12 tiles (the same as the range of a sieged tank), so if other units spot for the queen then parasite can be always safe.

How to react? If you spot a parasited neutral unit (and it’s not your parasite), kill it. If you’re terran and one of your units gets parasited, you can research restore for medics and remove the parasite. That will take time, though (unless you’re Krasi0, which researches restore pre-emptively and cures spell effects in moments). Zerg has 2 ways to remove parasite (if it ever happens, which is unlikely in ZvZ), both with limited use: 1. If a drone is parasited, you can turn it into a building. 2. If you have a queen of your own, you can place your own parasite on your unit, which overrides the enemy parasite. Protoss doesn’t have any options, and can only be rid of the parasite by killing its own unit.

You can also move a parasited unit away from your army, or use it to show the enemy what you want the enemy to see. The opposite approach is to put it in the front of your forces, so it is the first to be killed.

infest command center

What’s to say? If you bought the queen already and you can infest a command center, you should! For now, I won’t bother with infested terrans, or with details like stopping the attack when the command center falls below half HP so that it is not destroyed before the queen can infest it. Leaving the infested command center where it is may slow the enemy from retaking the base.

ensnare

Ensnare is useful against fast units in groups. I’ll try it first against marines, wraiths, and corsairs. Vultures are hard to tag, but I might experiment. It’s also useful to reveal cloaked units, so it may also be worth researching against dark templar, arbiters, and maybe ghosts.

An ensnared unit moves much more slowly (usually at half speed), and most unit types also shoot a little more slowly. It will be difficult to retreat, or to complete any other tactical maneuver. A logical reaction is to hold your ground until the green goo wears off; you lost a lot of mobility and only a little firepower, so rely on firepower.

broodling

Broodling is expensive to cast; it costs 150 energy, which takes a long time to build up. It’s also the only queen ability that can justify making more than a few queens. It’s good against expensive ground units like tanks and high templar—provided you keep the queens alive so they can do it again (the 100+100 cost of a queen plus the cost of the time to build energy is worth more than one 150+100 tank). Broodling is most valuable in the very late game, when the map is mined out; at that point you want to favor spellcasters no matter your race, because you won’t have the resources to replace units.

There are 2 counters to broodling: 1. Kill the queens. 2. Make units that cannot be broodlinged (wraiths, reavers, archons), or are not worth the cost of broodling (marines).

experience with the larva trick

I wasn’t planning to implement the larva trick now, because it’s not important. But after testing it for yesterday’s post and finding it easy, the extra work to complete the feature took only minutes, so I went ahead.

Steamhammer determines “the direction to the minerals” from a base’s hatchery by averaging together the offsets of the mineral patches from the center of the hatchery, giving the location of the average mineral patch. (There was already code to do this for another reason, I only factored it out, and it’s barely a few lines anyway.) Once every 20 frames, starting on frame 1 (not 0), it sends Stop indiscriminately to every larva at a base hatchery whose minerals are to the left. It desists after an early game time limit, or when the spawning pool finishes; almost all benefit should be in the early game, and zerglings may be slowed down by starting at the edge of the mineral line.

There are weaknesses to the implementation. When morphing a drone, Steamhammer does not select the larva closest to the minerals, so it often chooses a larva that is still in the process of moving left. Judging by eye, I think this weakness eliminates a third to half of the potential benefit. It’s possible that the indiscriminate Stop commands could sometimes prevent a drone from morphing on time; I didn’t check, but if so it should be rare. Probably a little extra benefit could be captured by doing it all game long, but more smarts would be needed.

The benefit is tiny, as I mentioned yesterday. I tested by playing Steamhammer versus itself with the same opening on Heartbreak Ridge, so that the left base uses the larva trick while the right base does not. In Steamhammer’s implementation, the edge gained by moving drones to the left, so that they begin to mine minerals earlier, is smaller than the natural variation between runs caused by the game’s random differences in timing and position. The technique is worth something, but so little that it was hardly worth implementing, even though it was easy.

An ideal implementation would be better. If you know what units you want to produce in the near future, and what their jobs will be, you can select the larvas of left-facing hatcheries that will become local mining drones and use the larva trick only on them, and do it in time to get them moved into position before you morph them. But that is no longer a simple job, and the benefit will still be small.

The other major use of the larva trick is to control egg blockades. If you have a wall consisting of a hatchery on the right and terrain or another building on the left, and zealots come knocking, you can move a larva to the left of the hatchery and morph it into an egg that blocks the gap. See the game Shark vs Reach (2008), explained on this TeamLiquid thread (it’s an example game on Liquipedia's larva trick article). I’m also fond of a famous 2x2 game from 2006—it may be from before the larva trick was discovered, but the video segment is short and worth seeing.

A larva follows a predictable path after it is tricked. If it is next to the upper half of the hatchery, it takes a route around the top; if in the lower half, around the bottom. The larva moves smoothly, so you can predict where it will be when. With good timing, you can morph an egg where you want, for example to push a unit away from your hatchery to gain time.

produce workers closer to the minerals

All 3 races have tricks they can sometimes do, depending on the starting position, to make workers spawn a little closer to the minerals they will mine. It provides a very small macro boost, starting early in the game when it matters most. I doubt that any of these tricks will make much difference in bot play; mineral locking gives a much larger edge. I haven’t noticed any bot implementing them. (Do you know of one?) On the other hand, they’re not hard to implement, and might possibly help the strongest bots.

terran

A fresh unit, just produced, appears to the bottom left of the building that produced it, like this new-made SCV:

SCV at bottom left of command center

If the minerals are on the left, cool. But in this case, the minerals are on the right, and the SCV starts far away. To get the SCV to spawn closer to the minerals, block the space on the left with your first supply depot. The left edge of the depot (3 tiles wide) is aligned with the left of the command center (4 tiles wide).

SCV closer to minerals due to supply depot

Then the SCV appears below the command center and to the right of the supply depot. You use your first supply depot because you want to start gaining the macro advantage (small as it is) right away; it matters most at the start of the game. Starcraft has consistent rules for where new units appear: As far toward the bottom and left of the producing building as possible. If you start with a barracks first, you can align the barracks (4 tiles wide, the same as the command center) exactly underneath, so that the SCV appears even closer to the minerals.

SCV at far right due to barracks

If SCVs are returning minerals at the time and place where the new SCV would spawn, blocking the spot, then the SCV may appear farther up the right side. That should not bother a bot in the least.

Pro terrans do this trick with their first depot. At their level of play, they think it’s worth it.

By the way, exit blocking tricks like this have game uses outside of macro. For example, if zerglings are attacking a barracks and the barracks is producing a marine, then zerg controls where the marine will spawn. Lings at the bottom left of the barracks can pull back a little so the marine spawns there, already surrounded. Pros do this too.

protoss

Protoss can do essentially the same trick with their first gateway, if the minerals are to the right of the nexus.

probe at far right due to gateway

Pros do not use this trick, as far as I’ve seen. The gateway should start only a little later than the terran supply depot, so I think the trick should still bring a tiny macro advantage. I suppose that pros find other factors more important for gateway placement.

zerg

Zerg produces drones from larvas, and exit blocking tricks don’t apply. Zerg has a completely different trick, apparently a weird bug in Starcraft, that is useful if the minerals are to the left of the hatchery: The larva trick. Except for this trick, larvas are not controllable. When performed by a human, select any larvas you want to move to the left together with an overlord, and hit stop. You can use a controllable unit other than an overlord if you don’t mind it stopping. The selected larvas will slide to the left side of the hatchery and stay there. And the overlord stopped, so you probably want to send it on its way. When a new larva appears, you have to repeat the trick to make it move—no trouble for a bot.

When I tested it in Steamhammer, I found that the overlord was not necessary. Apparently the overlord is only included to bypass UI limitations that BWAPI does not emulate. This simple test code, which runs only once on frame 0, worked for me.

  if (BWAPI::Broodwar->getFrameCount() == 0 &&
      BWAPI::Broodwar->self()->getRace() == BWAPI::Races::Zerg)
  {
      Bases::Instance().myMainBase()->getDepot()->getLarva().stop();
  }

Bases::Instance().myMainBase()->getDepot() returns the main base hatchery. BWAPI provides getLarva() which returns its set of larvas.

The larva trick also has game uses outside of early macro.